This tutorial assumes that your plugin has been submitted and approved by WordPress . https://wordpress.org/plugins/add/
Download and install TortoiseSVN
Create a folder on your pc, e.g. Documents -> WordPress_Repository -> My Plugin_Name
Right click on the folder and click SVN Checkout
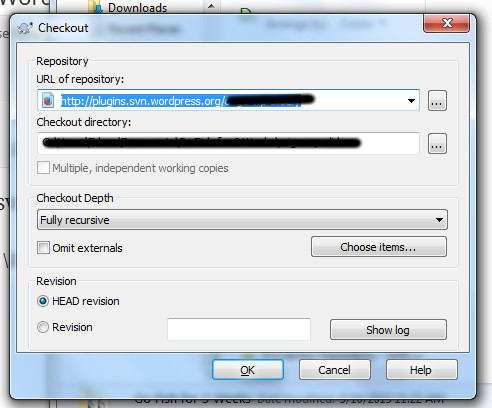
On the pop up window (see screenshot above), enter the SVN repository path, click OK and wait for the retrieving of files to finish.
If you don’t know the URL of repository of your plugin, check the email that WordPress sent you when they approved your plugin. The email heading is something like “[WordPress.org Plugins] Request Approved”.
It should be like https://plugins.svn.wordpress.org/your-plugin-slug
Once the process is done, go to /trunk/ folder, and put all the plugin files (not the plugin folder) there.
Right click on the plugin file folder and click on Commit.
 On the pop up window, enter comments/message and click OK. Wait for the process to finish
The plugin folder will now have a green check mark.
Go to the trunk folder, and click TortoiseSVN -> Branch/Tag.
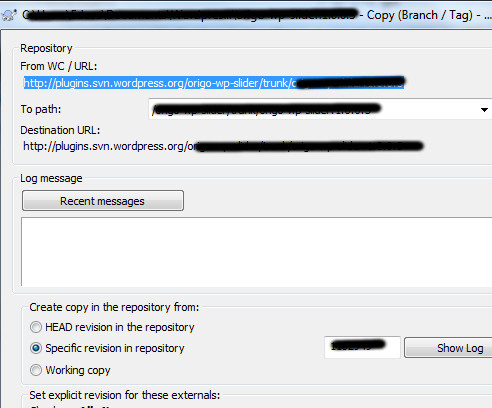
On the pop up window (see screenshot above), change the To Path value by replacing /trunk/plugin-folder to /tags/version.
E.g.
Current To Path: /folder-name/trunk/plugin-folder
Final To Path: /folder-name/tags/1.0.0
Click OK and wait for the process to finish.
When you go to tags folder, you won’t see the new version yet. To download it, go to tags folder, right click and select SVN update.
Note: Make sure the Stable Tag on the readme.txt and the Version on the plugin’s main file is the same.